



Accessible summary
What this session covers
This foundational session explains how built-in accessibility and personalisation features in Windows and Microsoft 365 can reduce friction in everyday digital work. It focuses on exploring support safely, changing one setting at a time and helping other people without making assumptions about identity, diagnosis or capability.
- accessibility and personalisation as everyday choices
- Windows settings for display, hearing, interaction and focus
- Immersive Reader, Read Aloud and Dictate for reading and creation
- captions and different participation routes in Microsoft Teams
- inclusive ways to explore, explain and signpost support
Making the session work for you
The session is delivered through a Microsoft Teams webinar using PowerPoint Live. You can personalise how you follow and take part. The session is recorded, and you can watch rather than follow along unless the trainer asks you to try something.
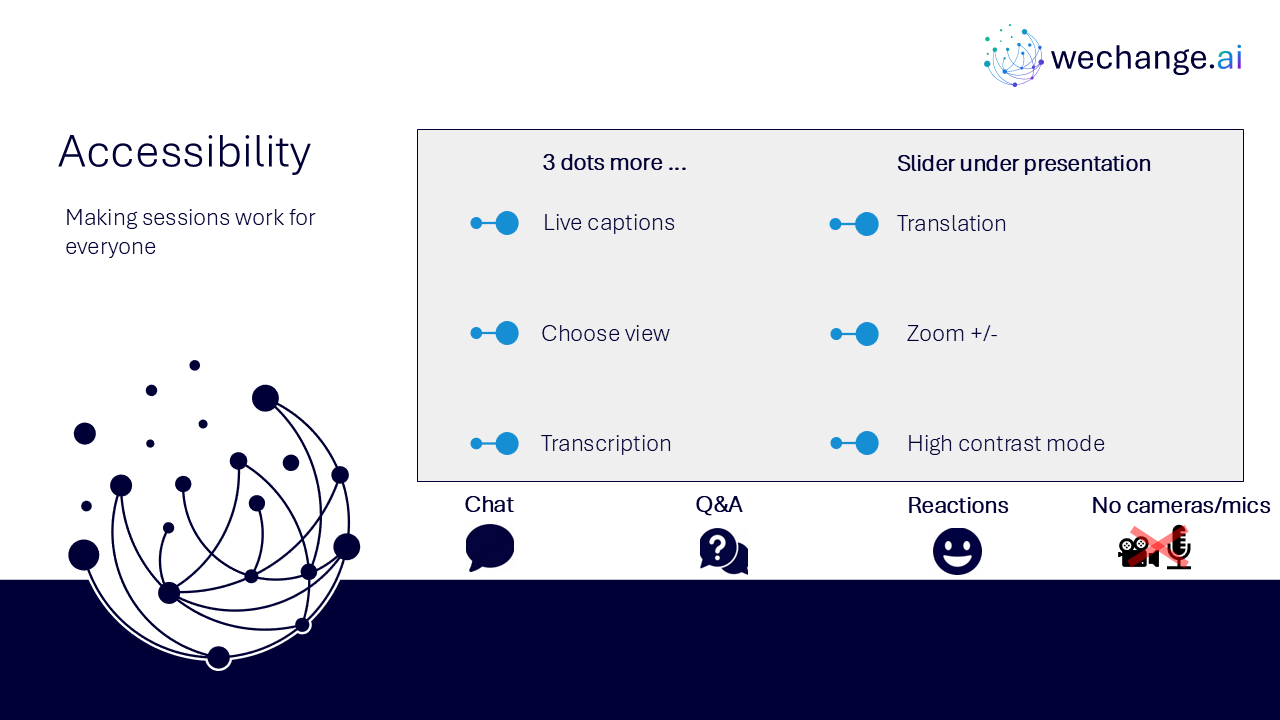
- use live captions or translation from the three-dots menu
- choose a view that gives you the clearest layout
- use the slider below the presentation to zoom in or out
- keep your camera and microphone off unless you are invited to use them
- use Q&A for questions and keep chat closed when you are not typing
- use reactions or another participation option if that works better for you
- share respectful feedback and use the key links provided in chat
Everyone is on a confidence spectrum
These sessions are for everyone, whatever your starting point. You do not need to remember every feature. The aim is to learn a reliable route, understand what an option changes and identify one choice that may make a task easier.
Navigator and WeChange.AI
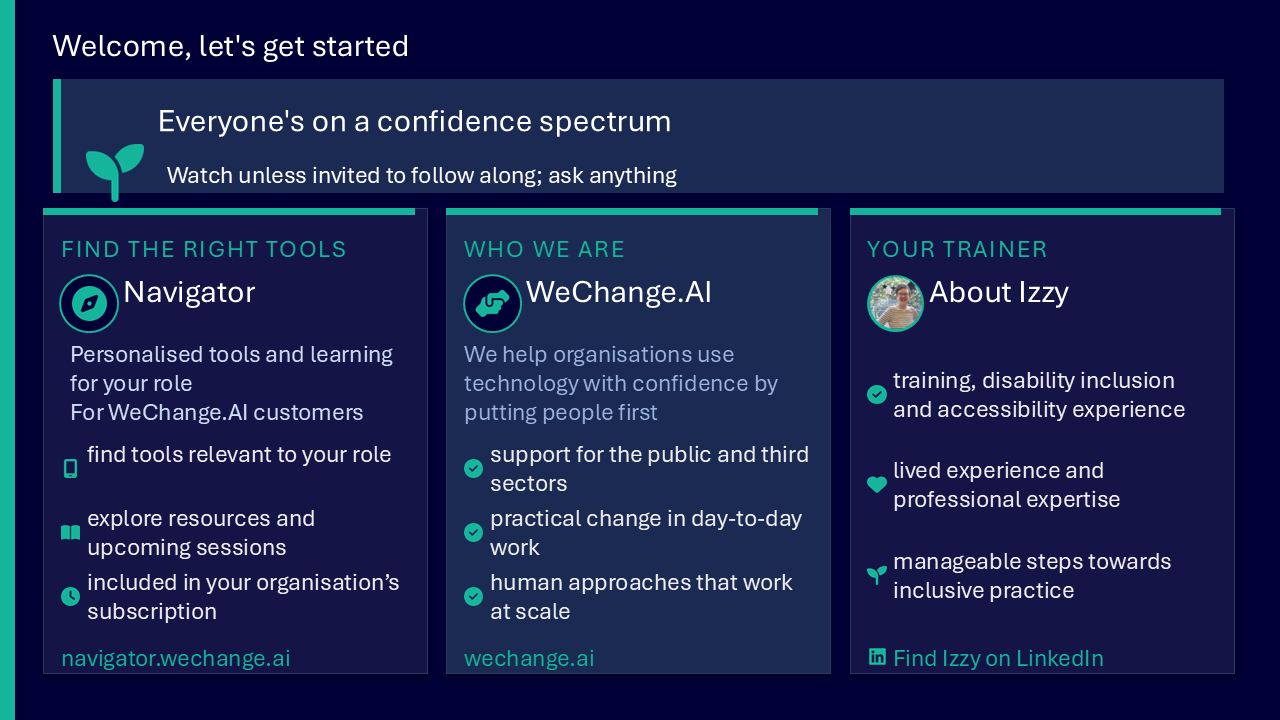
Navigator is a personalised platform for WeChange.AI customers. It helps you find Microsoft 365 applications, features, resources and upcoming sessions that are relevant to your role.
WeChange.AI supports public and third sector organisations to use technology with confidence, purpose and impact. The focus is practical, people-centred change in day-to-day work.
Key concepts
The challenge
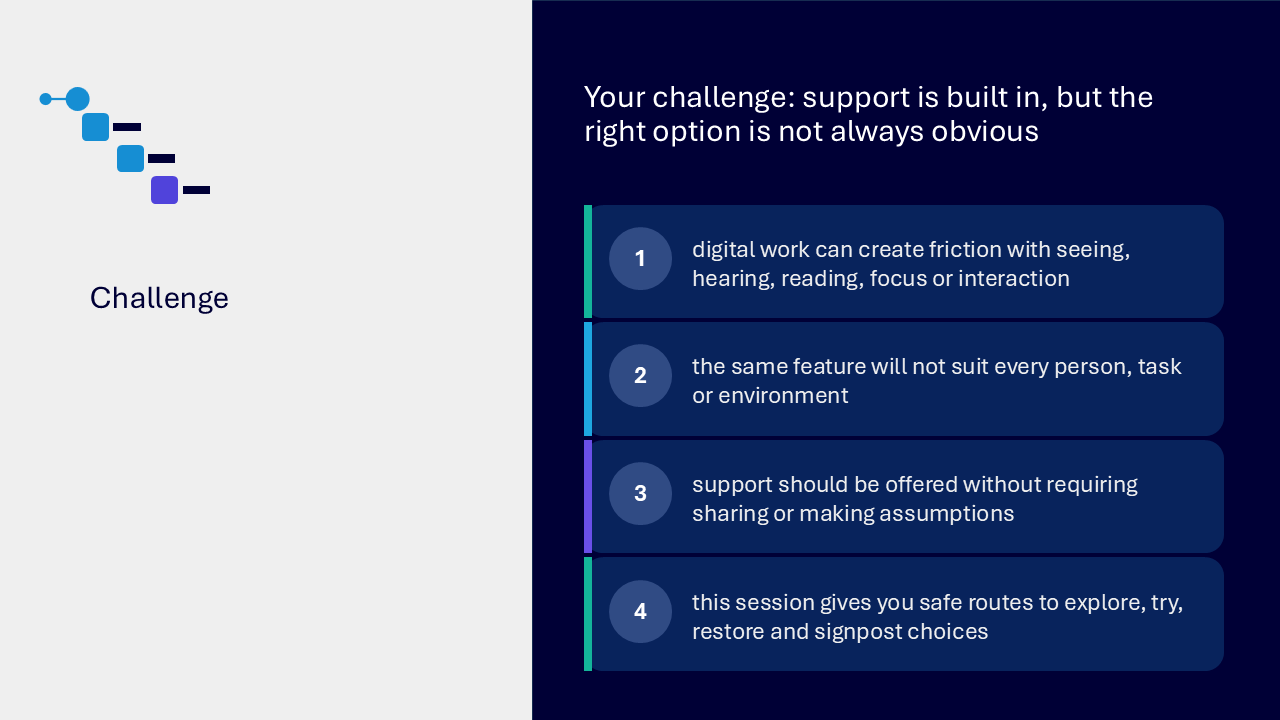
The challenge visual presents four connected points. Digital work can create friction with seeing, hearing, reading, focus or interaction. The same feature will not suit every person, task or environment. Support should therefore be offered as a choice, without requiring disclosure or making assumptions. Safe routes to explore, test, restore and signpost features help people remain in control.
Your route through the session
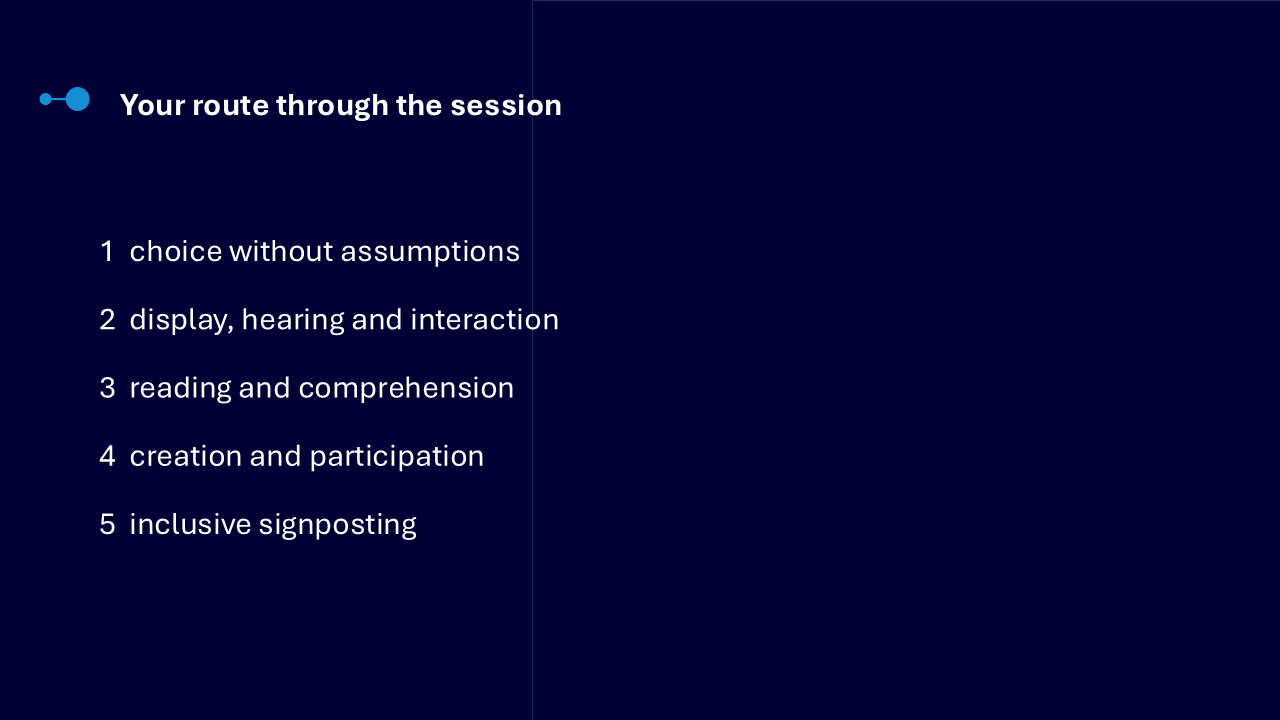
The route graphic presents five stages that move from individual choice to practical and inclusive support.
- choice without assumptions
- display, hearing and interaction
- reading and comprehension
- creation and participation
- inclusive signposting
Begin with individual choice
Accessibility and personalisation settings are everyday tools that may reduce friction in different situations. A feature should not be linked to an assumed diagnosis, identity or capability. Neutral wording, such as “some people may find this useful”, allows a person to consider an option without pressure. Most personal settings can be changed again, so people can explore and decide what works for them.
Find Windows Accessibility settings
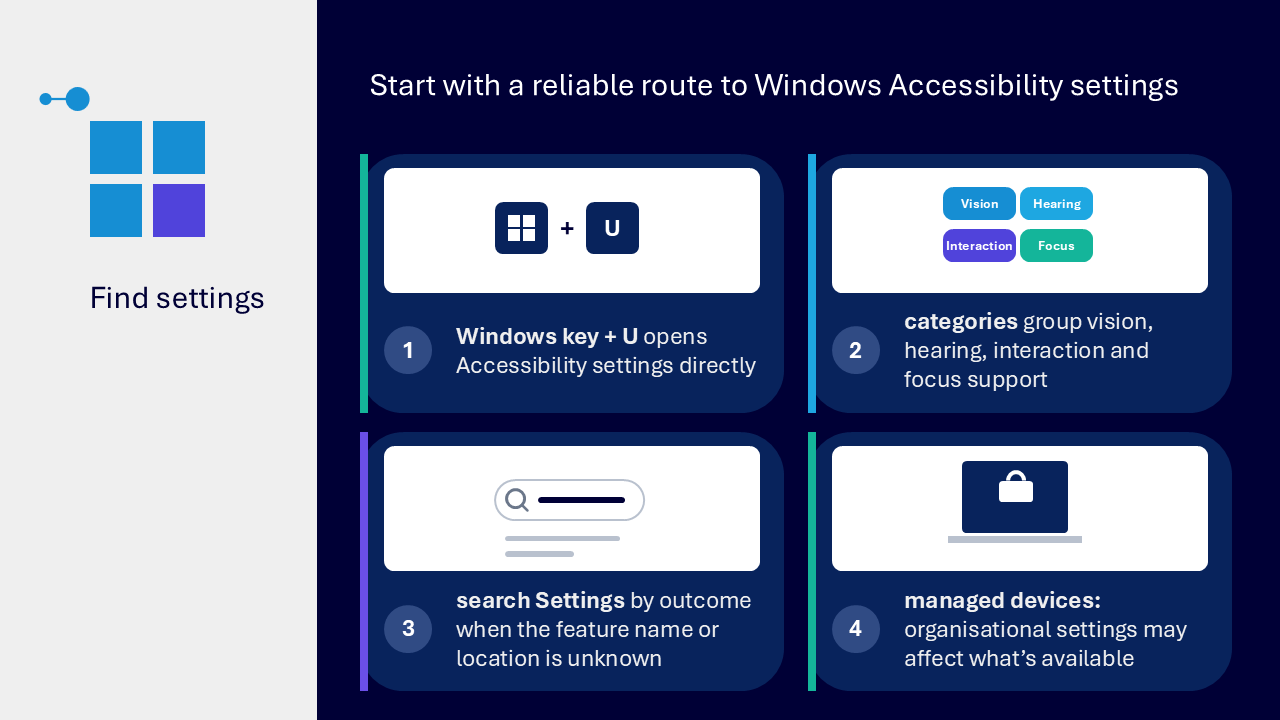
Windows key + U opens Accessibility settings directly. The settings are grouped into areas such as vision, hearing and interaction. If you know the outcome you want but not the feature name, search in Settings. On a device managed by your organisation, policy or device configuration may affect which options are available.
- press Windows key + U
- scan the available categories before changing anything
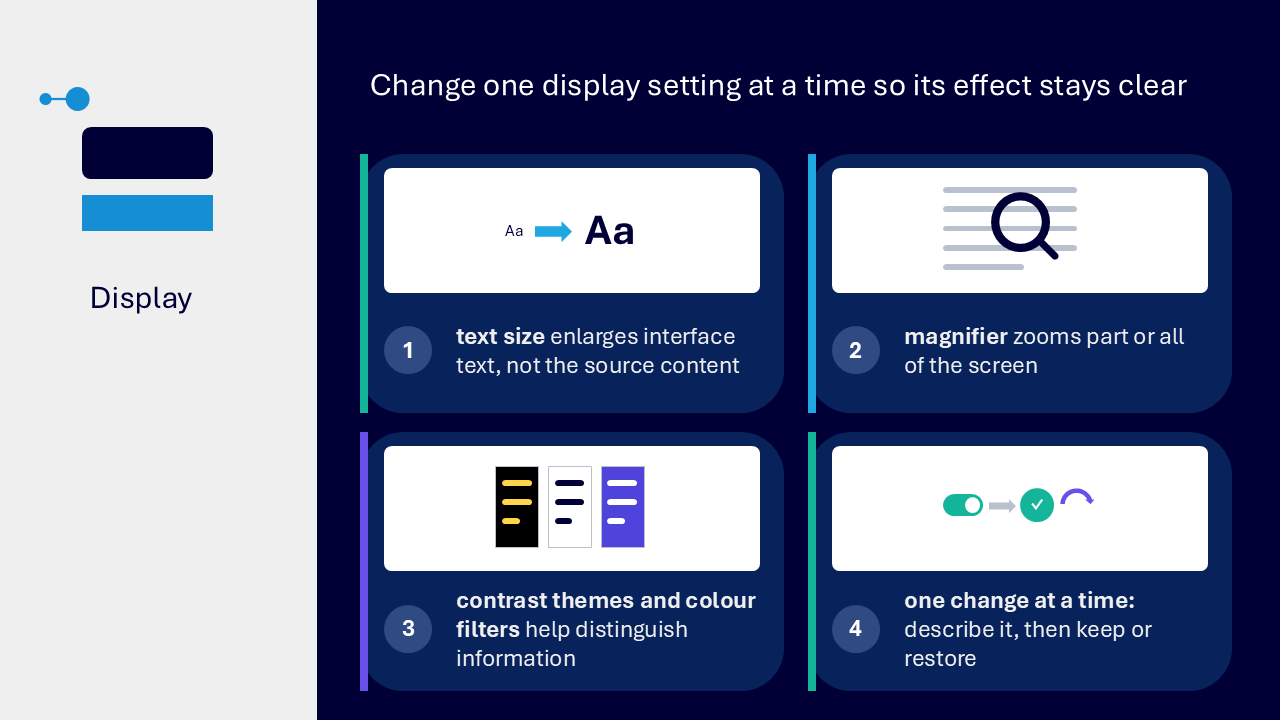
- change one setting at a time
- notice and describe the effect
- keep, adjust or restore the setting
Display choices
Display settings change how information appears for the person using the device. Text size can enlarge interface text, Magnifier can enlarge part or all of the screen, and contrast themes or colour filters can change how information is distinguished. Changing one option at a time makes its effect easier to understand and reverse.
Hearing and caption choices
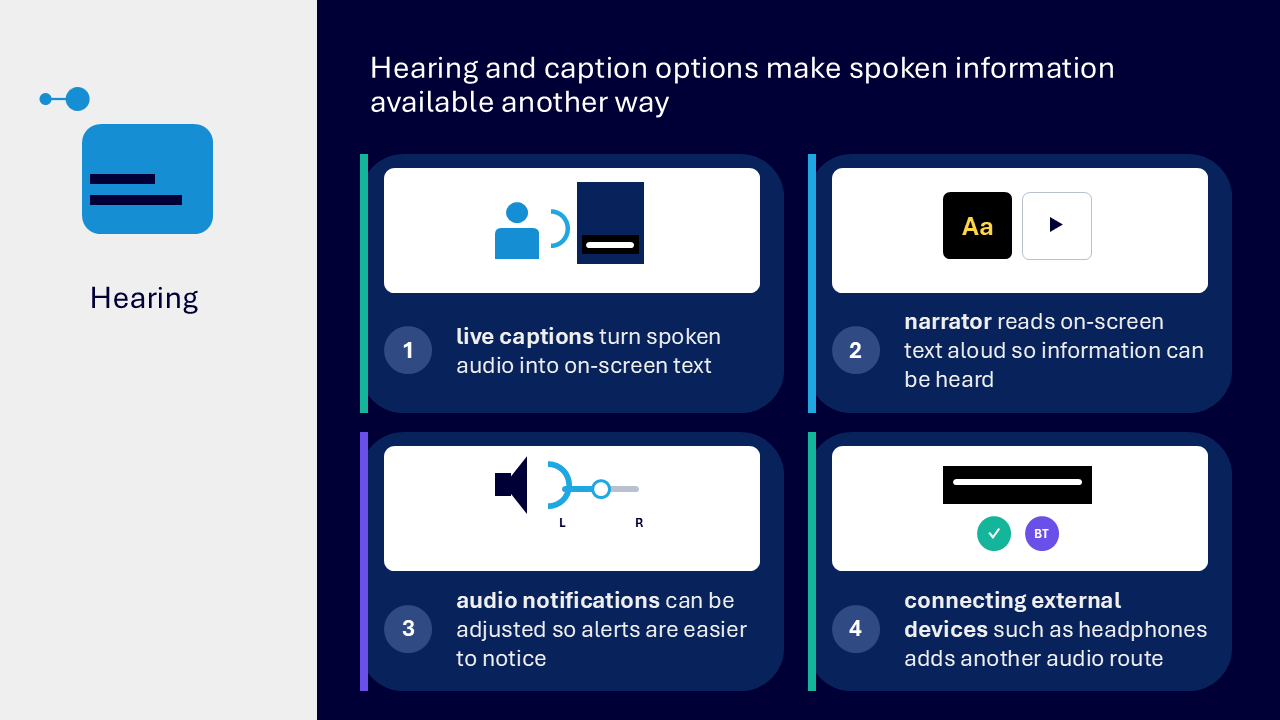
Live captions can convert spoken audio into on-screen text. Caption appearance can be personalised for readability and contrast, while audio settings can help with balance or noticing sound. Captions provide another route to spoken information, but their accuracy and important context still need checking.
Interaction and focus choices
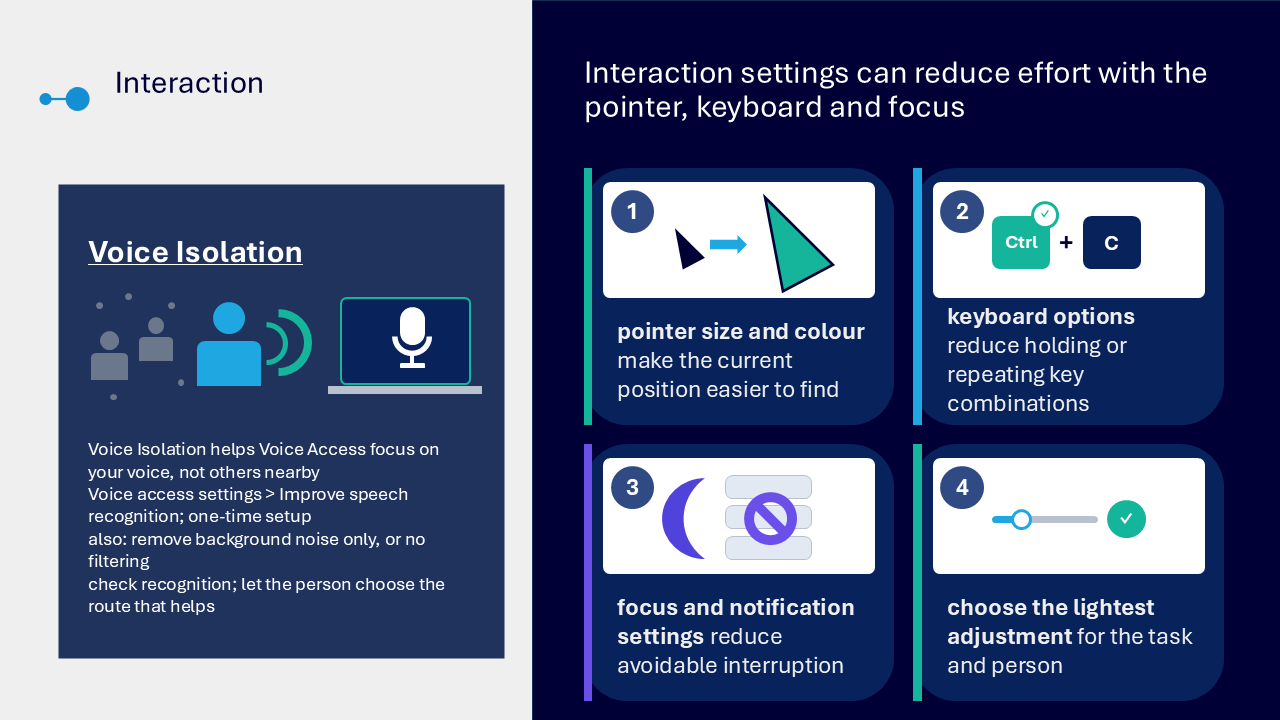
Pointer size and colour can make the current position easier to locate. Keyboard settings can reduce the need to hold or repeat combinations of keys. Focus and notification settings can reduce avoidable interruption. The lightest useful adjustment is usually a good starting point.
The demonstration also introduced Voice Isolation for Voice Access. In a supported experience, it can help Voice Access focus on the speaker in a shared setting with moderate noise. Recognition should be checked, and the person should choose whether this route is useful.
Choose by the friction, not an assumption
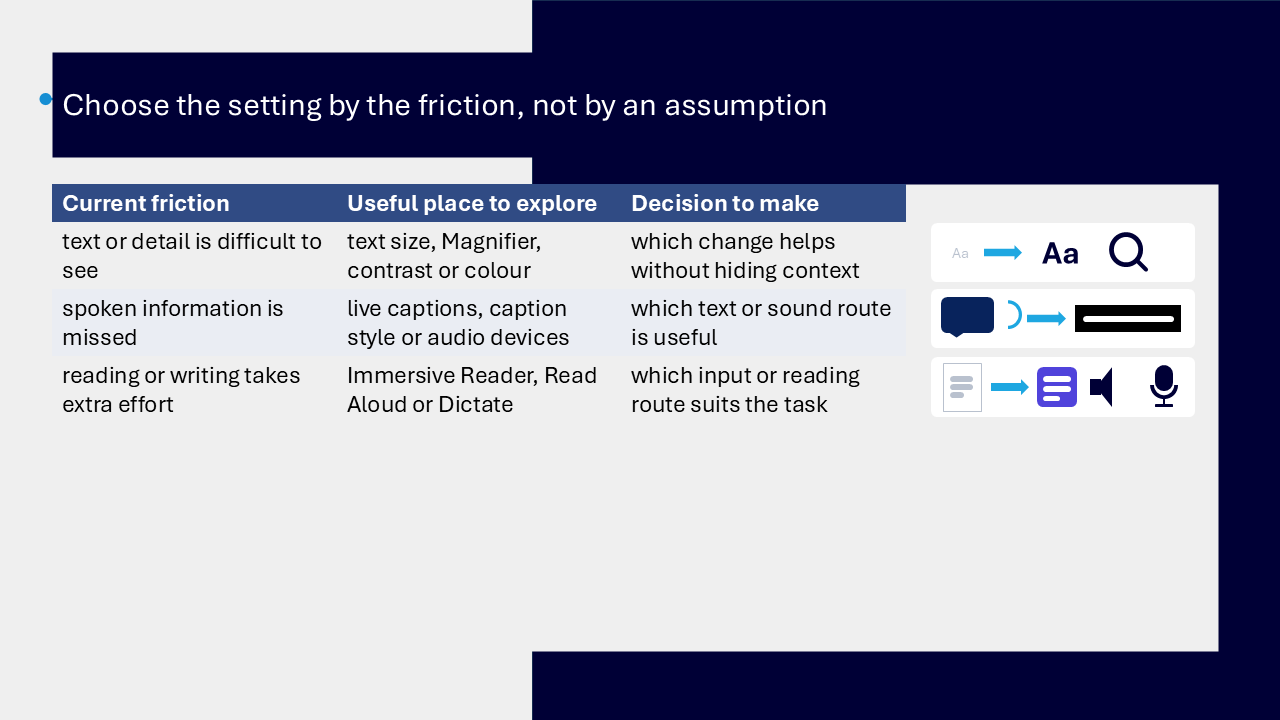
The comparison table in the session connects a current difficulty with a useful area to explore. It does not prescribe a setting. The person still decides which route suits the task.
| Current friction | Useful place to explore | Decision to make |
|---|---|---|
| text or detail is difficult to see | text size, Magnifier, contrast or colour | which change helps without hiding useful context |
| spoken information is missed | live captions, caption style or audio | which text or sound route is useful |
| reading or writing takes extra effort | Immersive Reader, Read Aloud or Dictate | which input or reading route suits the task |
Immersive Reader
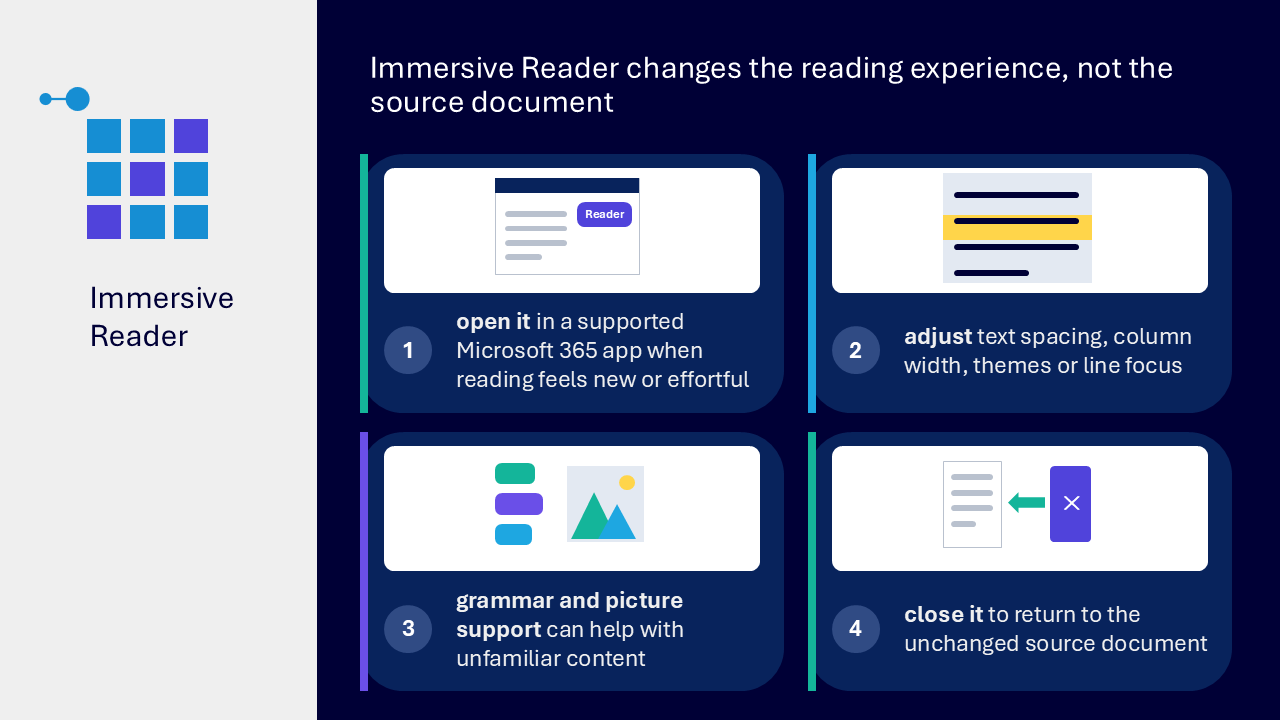
Immersive Reader changes the reading experience without changing the source document. In supported Microsoft 365 experiences, it can adjust text spacing, column width, themes or line focus. Grammar and picture support may help some people process unfamiliar content. Closing Immersive Reader returns you to the unchanged source.
Read Aloud
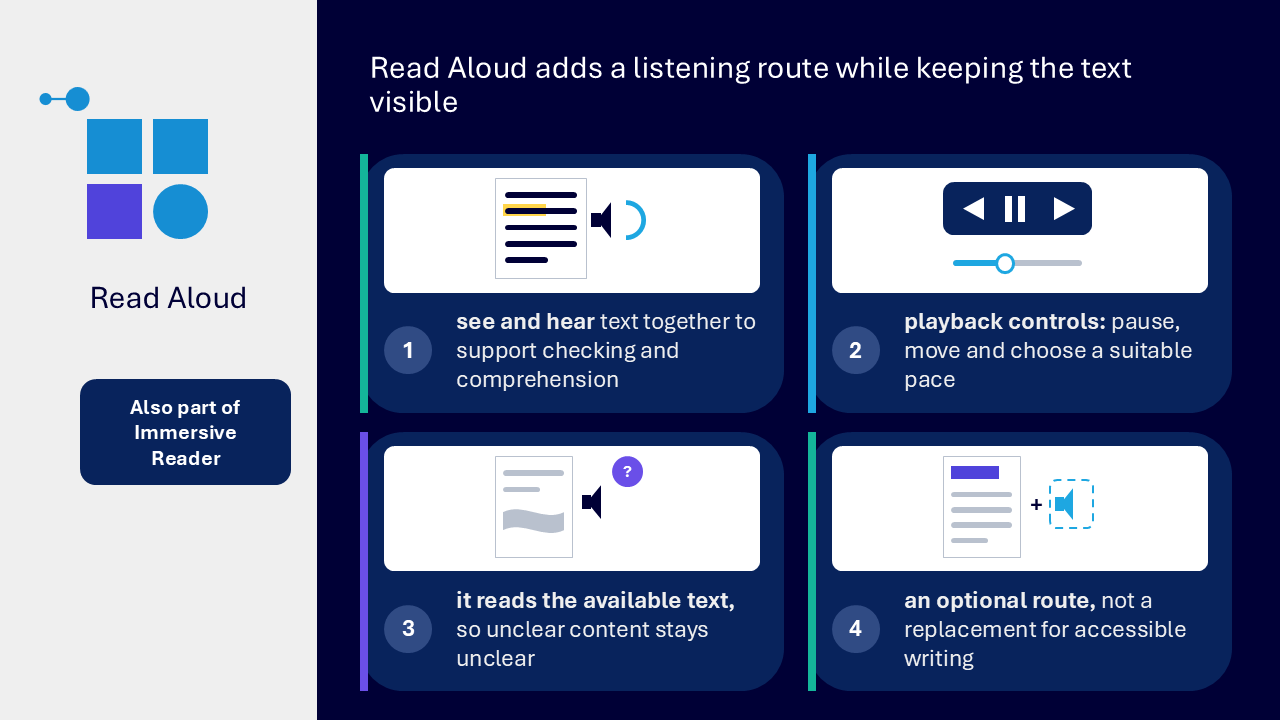
Read Aloud adds a listening route while keeping the text visible. Playback controls allow the listener to pause, move through the text and select a suitable pace. The feature reads the available text, so unclear writing remains unclear. It is an optional route, not a replacement for accessible content.
Dictate
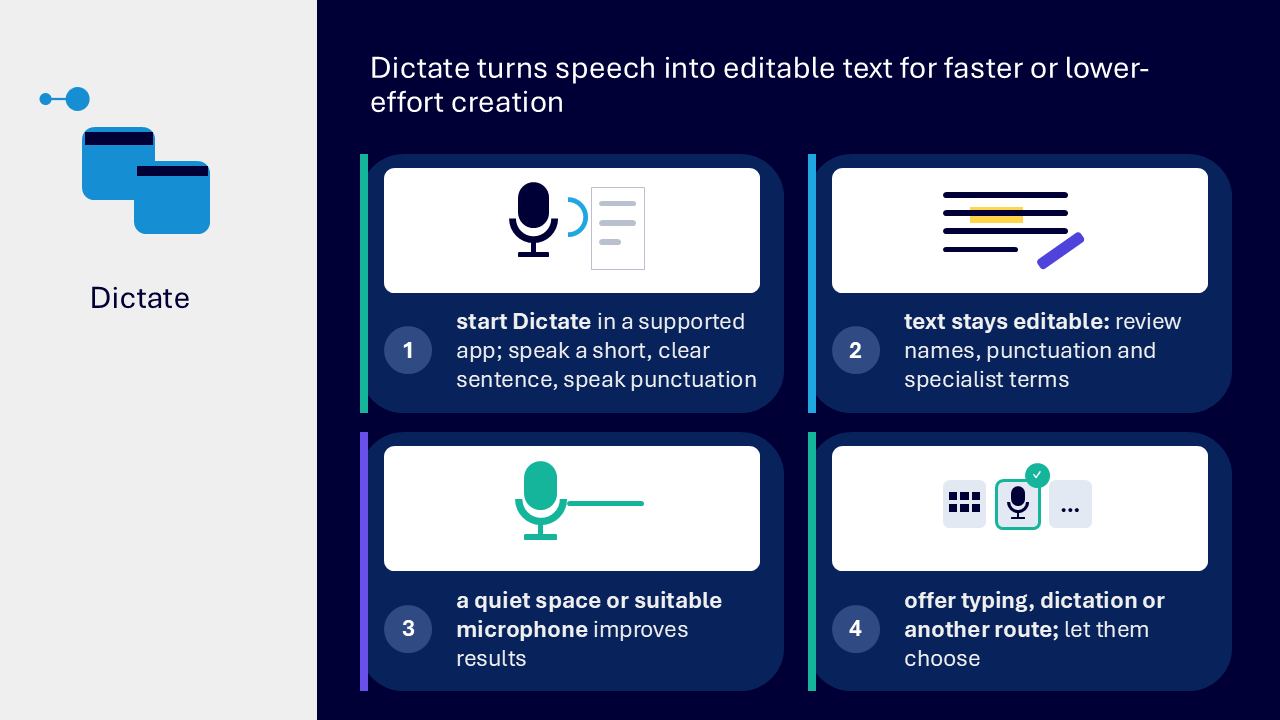
Dictate turns speech into editable text in supported applications. Names, punctuation and specialist terms should be reviewed because recognition may not be exact. A suitable microphone or quieter environment may improve the experience. Typing, dictation and other input routes should be offered as choices.
Captions and participation in Microsoft Teams
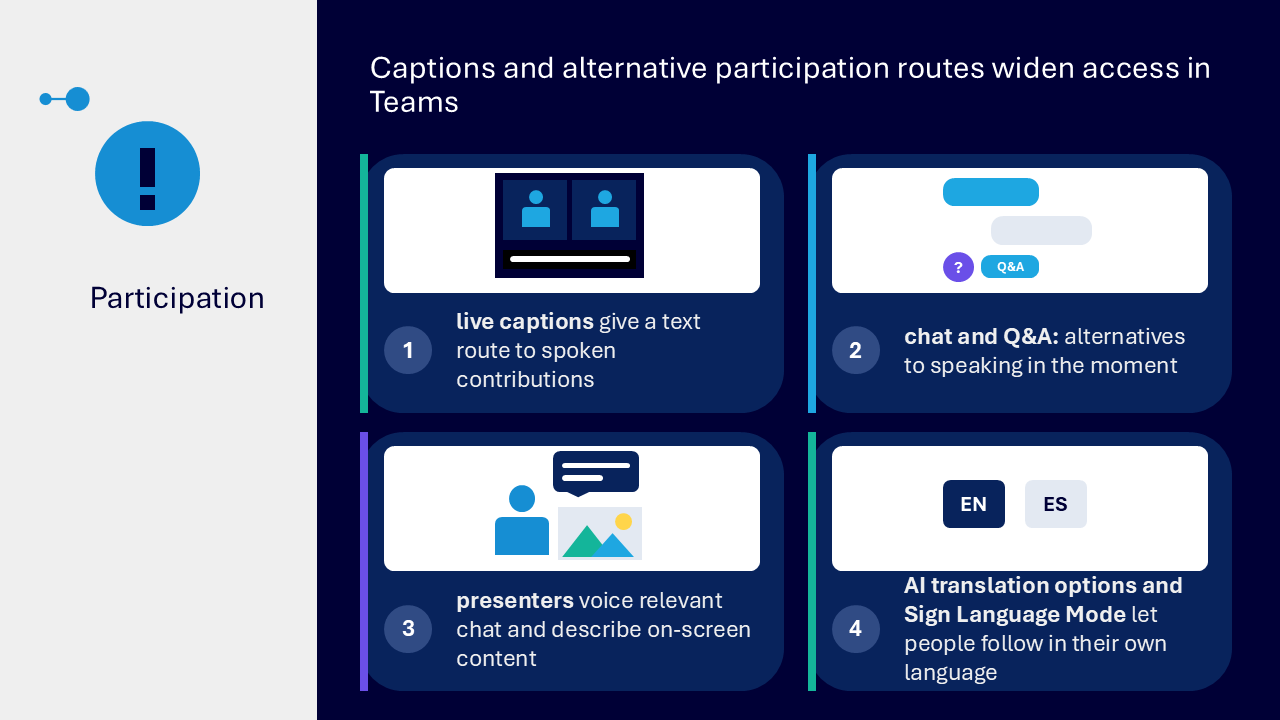
Microsoft Teams can provide different ways to follow and contribute. Live captions give a text route to spoken contributions, while chat and Q&A provide alternatives to speaking at that moment. Presenters should describe important on-screen content and verbalise relevant contributions that would otherwise only appear in chat.
Personal views and shared content
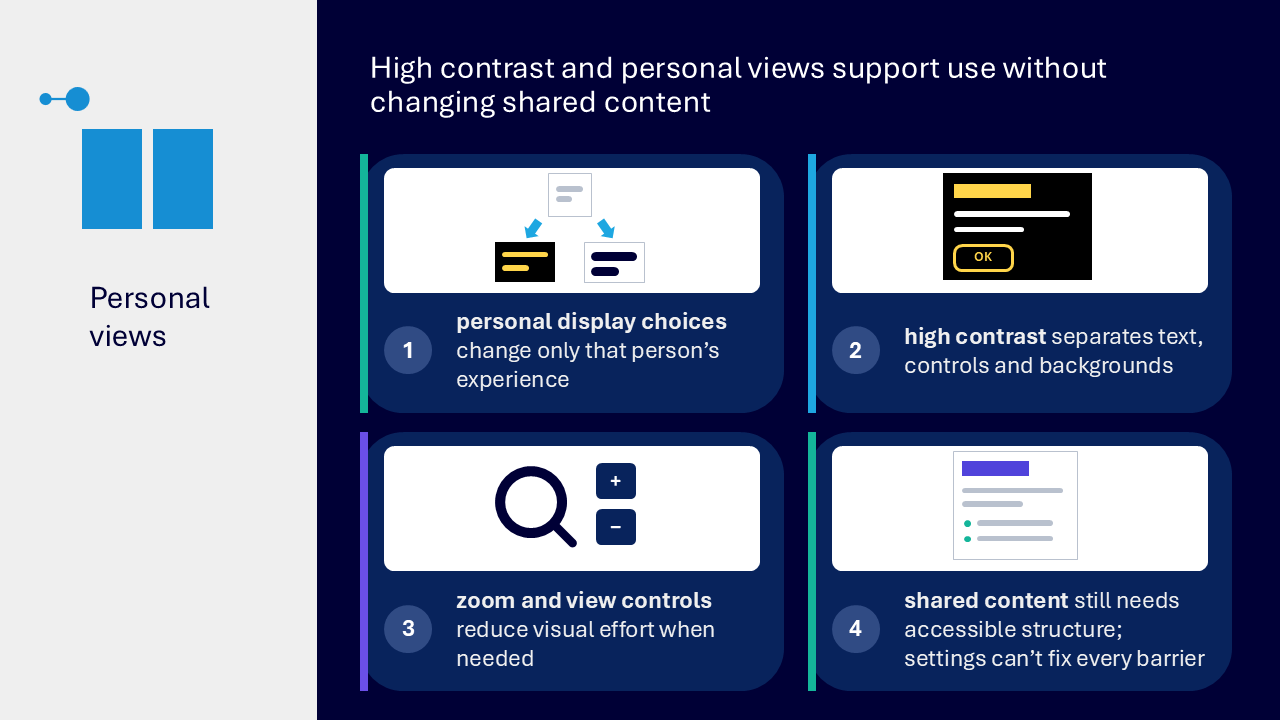
Personal display choices, including high contrast, zoom and viewing controls, can reduce effort for an individual without changing shared content. These settings cannot remove every barrier. Shared documents and presentations still need accessible structure, meaningful reading order, clear language and appropriate descriptions of visual information.
Offer choices rather than a recommended setting
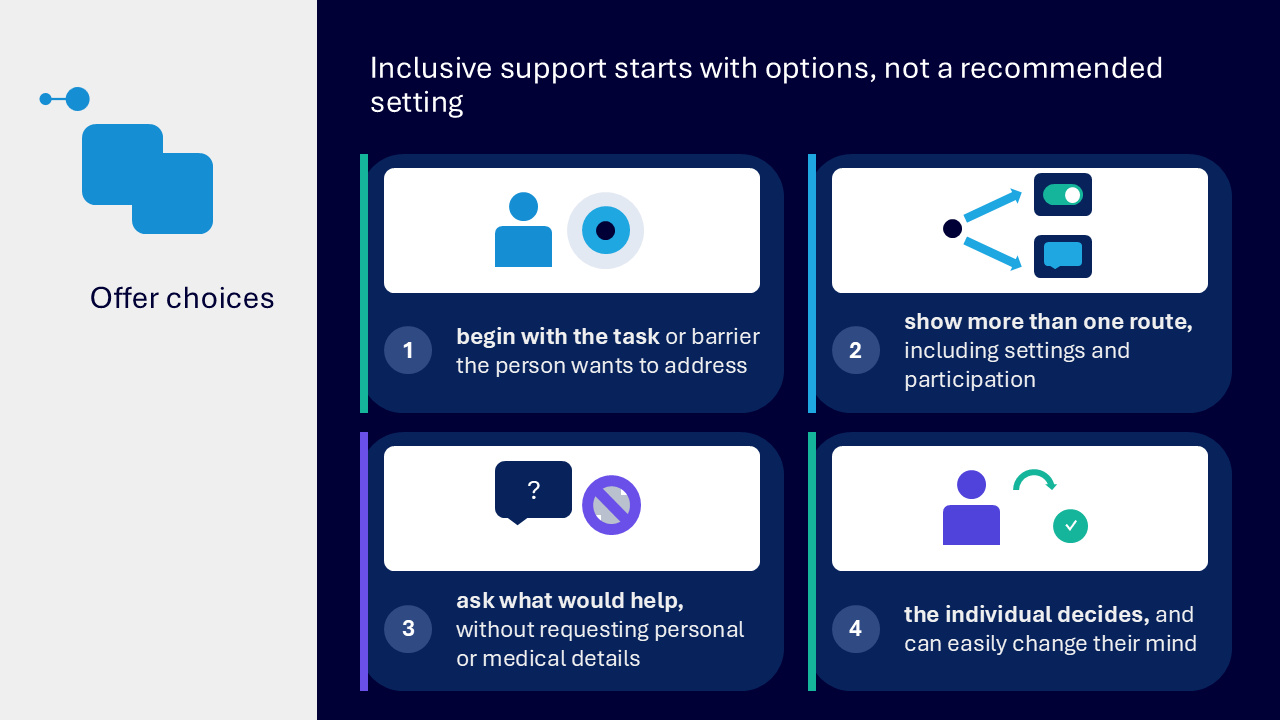
Inclusive support begins with the task or barrier the person wants to address. Where useful, show more than one route and explain what each option changes before enabling it. Ask what would help without requesting personal or medical information. Leave the choice with the individual and make it easy to change their mind.
A simple support conversation
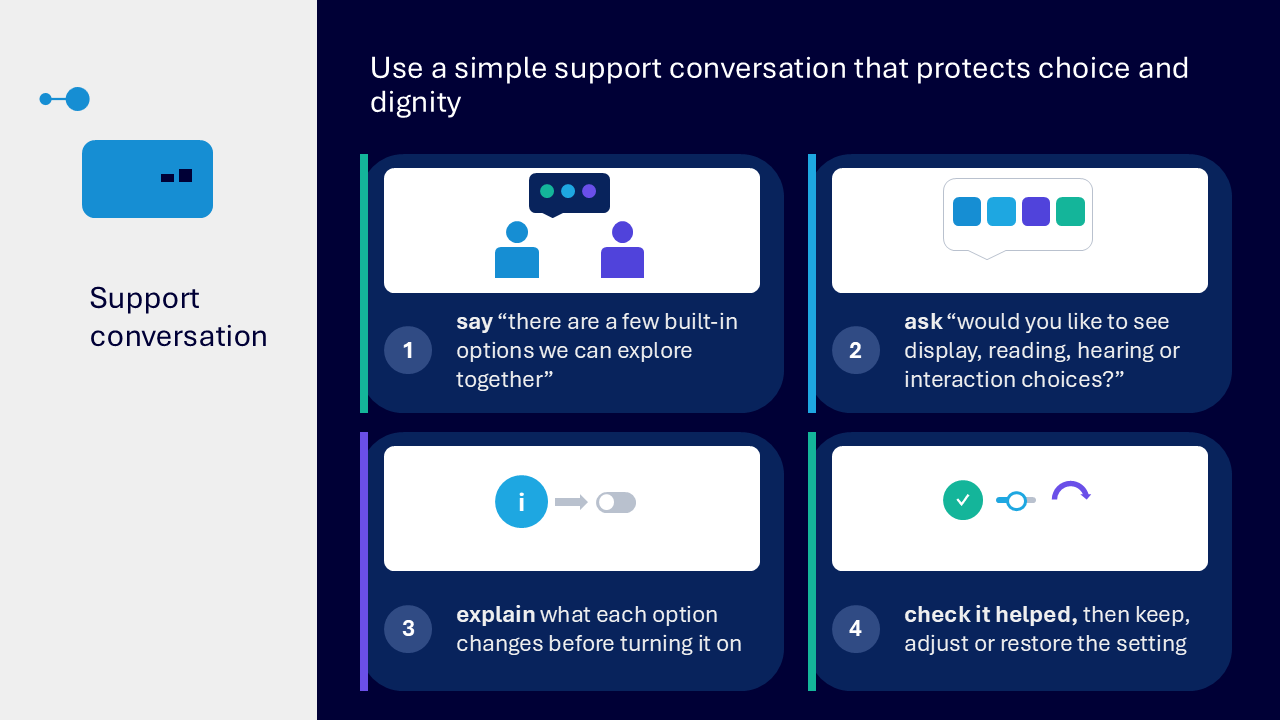
The support conversation diagram models a short, choice-led sequence:
- say “there are a few built-in options we can explore together”
- ask “would you like to see display, reading, hearing or interaction choices?”
- describe what each option changes before turning it on
- confirm whether it helped, then keep, adjust or restore the setting
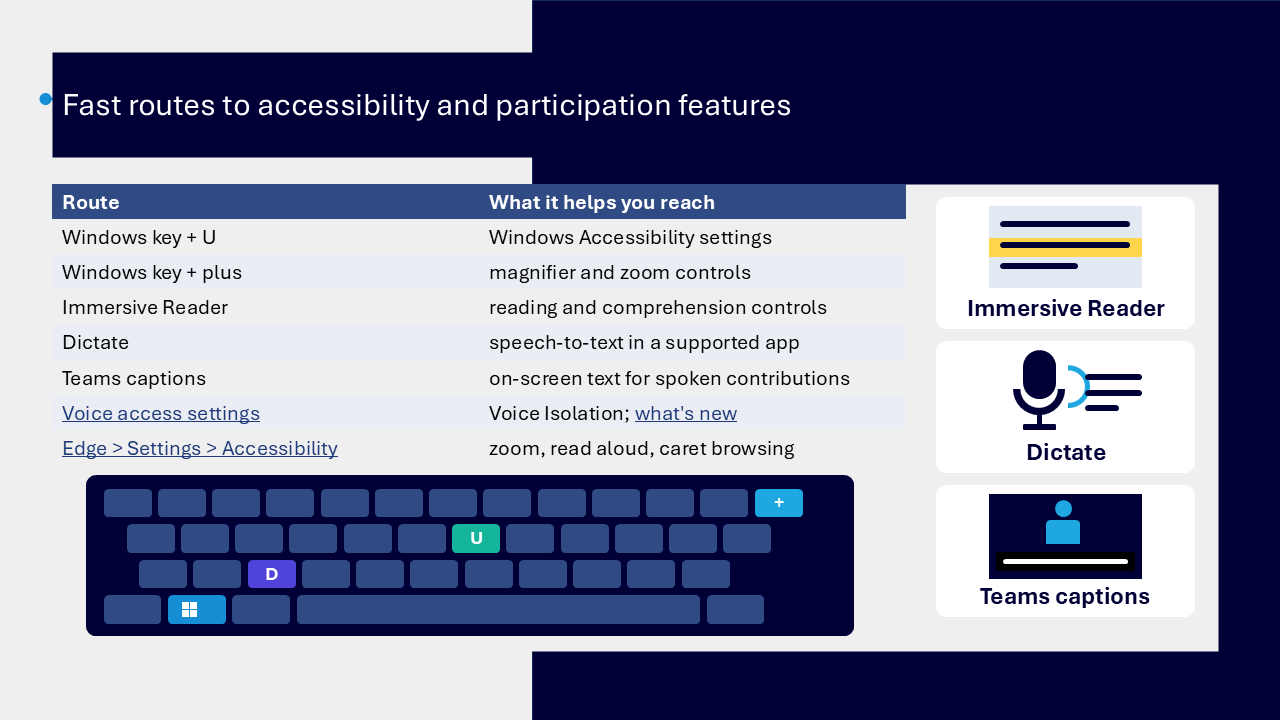
Fast routes to useful features
| Route | What it helps you reach |
|---|---|
| Windows key + U | Windows Accessibility settings |
| Windows key + plus | Magnifier and zoom controls |
| Immersive Reader | reading and comprehension controls |
| Dictate | speech-to-text in a supported application |
| Microsoft Teams captions | on-screen text for spoken contributions |
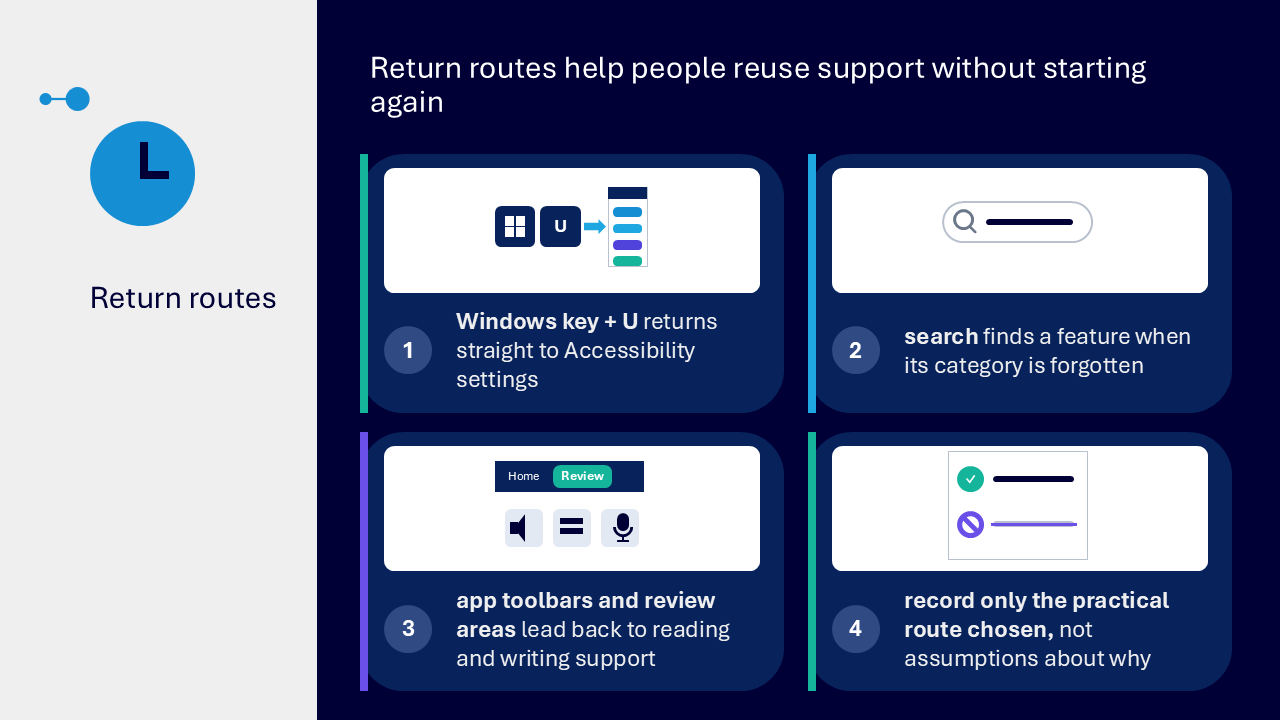
Return routes support confidence
A reliable return route helps someone reuse a chosen feature without starting again. Windows key + U returns to Accessibility settings, Search can find a feature when its category is not remembered, and application toolbars or review areas provide routes back to reading and writing support. Record only the practical route someone chooses, not assumptions about why they use it.
What the visuals and demonstrations showed
The visual sequence moved from recognising a current friction to exploring a suitable category, trying one reversible change and leaving the final choice with the individual. The demonstrations showed the purpose and effect of features rather than expecting everyone to use the same settings.
- opening Accessibility settings with Windows key + U
- exploring text size, Magnifier, contrast or colour options
- reviewing live captions and caption appearance
- adjusting pointer, keyboard or focus settings
- using Immersive Reader and Read Aloud without changing the source
- creating editable text with Dictate
- using captions, Q&A and other participation routes in Microsoft Teams
- describing options neutrally and restoring a setting when it does not help
Key takeaways
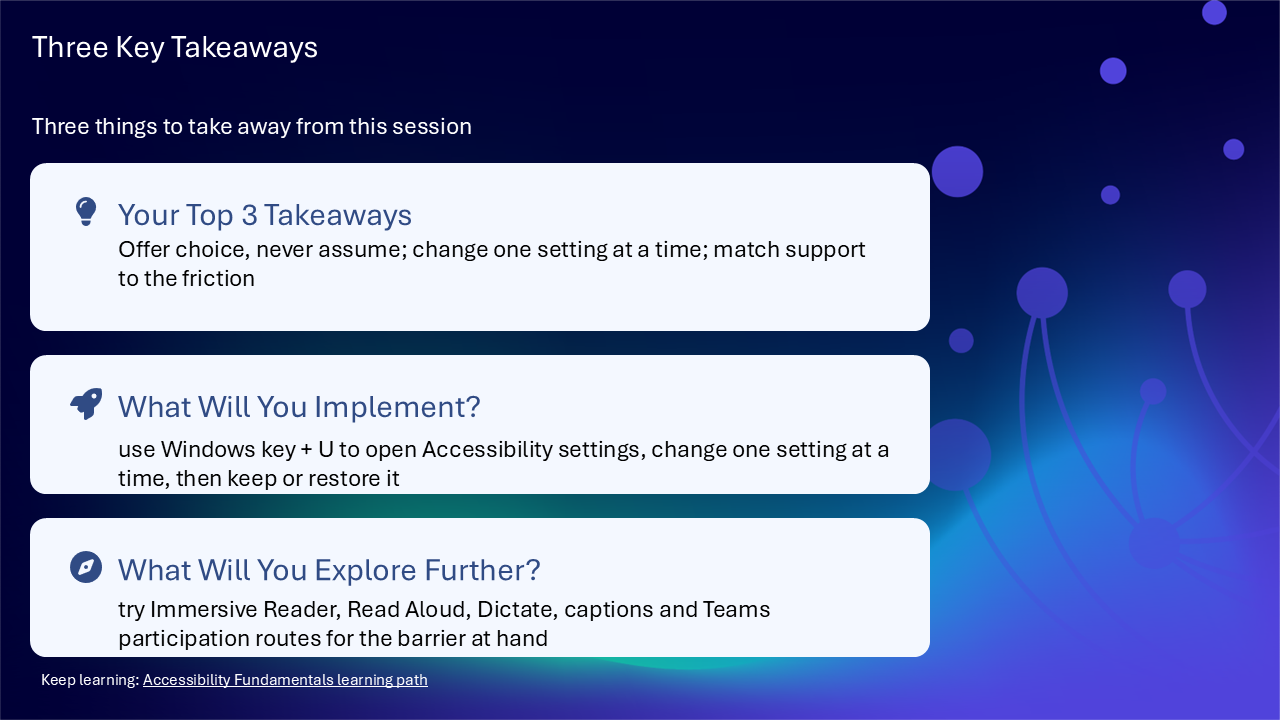
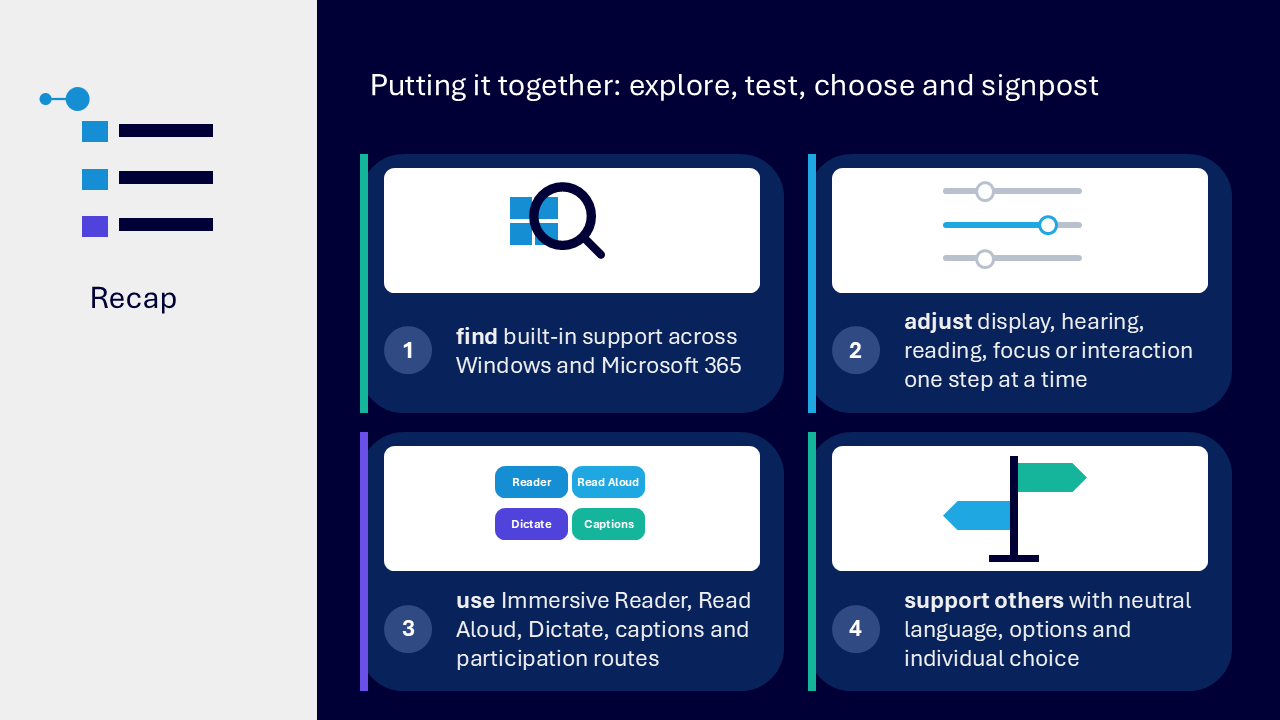
- accessibility and personalisation are everyday choices, not assumptions about a person
- change one setting at a time so its effect remains clear and reversible
- use Windows key + U, Immersive Reader, Read Aloud, Dictate, captions and participation routes as options rather than prescriptions
A clear route for inclusive support
- begin with the task or friction the person identifies
- offer a small number of relevant options
- explain what each option changes
- let the person choose whether to try it
- check the effect and keep, adjust or restore the setting
- share a dependable return route for later
- protect privacy by recording the practical choice rather than an assumed reason
Actions you can take
Try the tip of the month
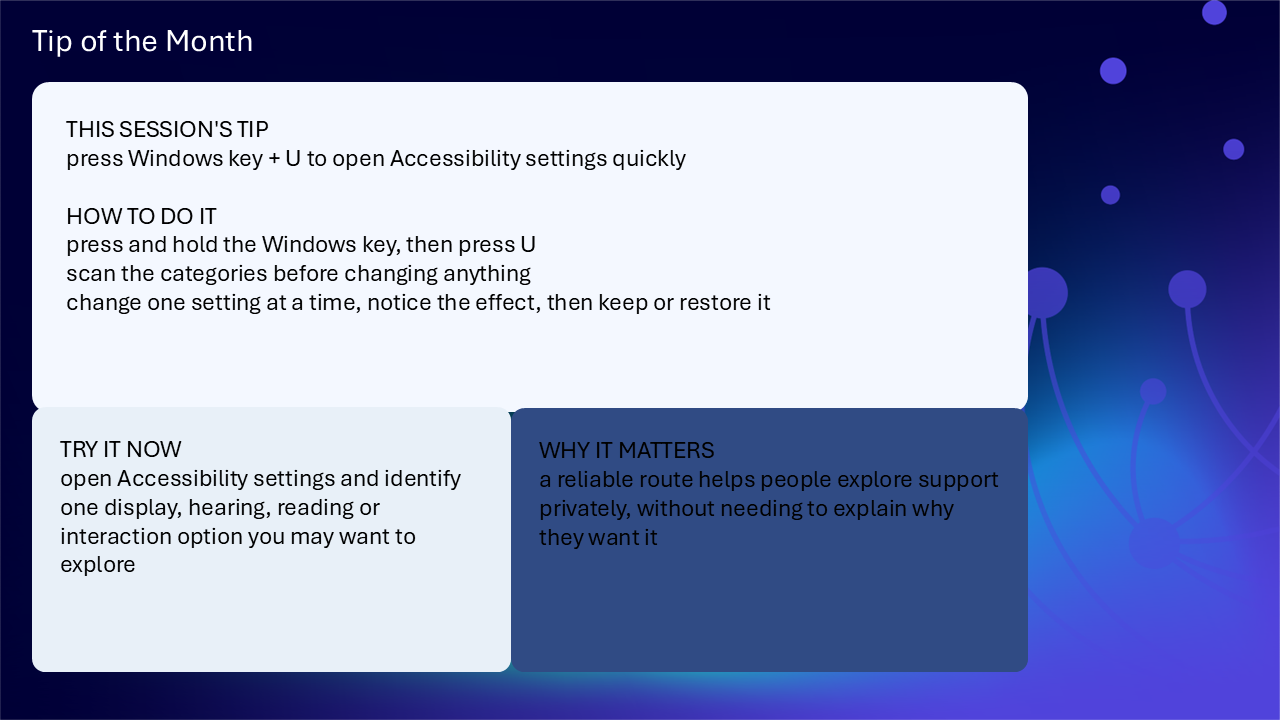
This session’s tip: press Windows key + U to open Accessibility settings quickly
How to do it: press and hold the Windows key, then press U. Scan the categories before changing anything. Change one setting at a time, notice the effect, then keep or restore it
Why it matters: a reliable route helps people explore support privately, without needing to explain why they want it
Try it now: open Accessibility settings and identify one display, hearing, reading or interaction option you may want to explore
Build confidence with one safe practice
- open Windows Accessibility settings using Windows key + U
- choose one non-sensitive setting that is safe to explore
- read the description before enabling it
- change only that setting and notice the effect
- restore the setting if it does not help
- identify the route you would use to find it again
- practise describing the option without linking it to a diagnosis or identity
Questions and feedback
Questions are welcome. If something is unclear, ask for it to be explained another way or demonstrated again. Feedback helps WeChange.AI understand what matters to you.
Complete the Support and Skilling Week feedback form
Contact WeChange.AI
For skilling queries, email training@wechange.ai.
Andrew Boxall, Managing Director: andrew@wechange.ai
Paul Ford, Industry Director for Education and Philanthropies: paul@wechange.ai
Josh Wilson, Industry Specialist: josh@wechange.ai
Elle Avilla, Customer Success and Delivery Skilling Lead: elle@wechange.ai
Izzy Pochin, Resources and Accessibility Lead: izzy@wechange.ai
Activity sheet
Use these sheets during a live demonstration or work through them independently. Each activity uses manageable steps and gives you a safe route to try, review and, where appropriate, restore a setting.
What you will practise
- open Windows Accessibility settings using a reliable shortcut
- explore display, hearing, reading and interaction choices
- change one setting at a time and review its effect
- use Microsoft 365 reading and writing support
- use captions and alternative ways to participate in Teams
- support another person without making assumptions
Before you begin
Use a Windows 11 device where possible. Your organisation may manage some settings, licences or connected experiences, so your screen or available options may differ. If a setting is unavailable, note it and continue with the next activity.
A safe way to explore
- begin with the task or friction you want to address
- change one setting at a time
- notice what changed and whether it helped
- keep, adjust or restore the setting
- leave the final choice with the person using the device
How to use these activity sheets
You do not need to complete every activity in one sitting. Choose the activity that matches what you want to make easier.
During a live session
- watch the trainer demonstrate the route first
- follow along only when invited and when it is safe to change your device settings
- use the check boxes to record what you tried
- ask questions through the participation route available to you
When working independently
- read the outcome and preparation section before starting
- complete each numbered step in order
- pause if the screen differs and use Settings search to find the feature name
- record the route that worked so you can return to it later
Remember
Accessibility and personalisation are everyday choices. A feature may help in one task or environment and not another. Avoid linking a setting to an assumed diagnosis, identity or capability.
Activity map
| Activity | Purpose | Features |
|---|---|---|
| 1 | find Accessibility settings | Windows key + U |
| 2 | adjust display choices | text size, Magnifier, contrast and colour |
| 3 | explore hearing and interaction | live captions, pointer and keyboard |
| 4 | change the reading experience | Immersive Reader and Read Aloud |
| 5 | create text using speech | Dictate |
| 6 | participate in Teams | captions, chat, Q&A and viewing choices |
| 7 | support another person | neutral, choice-led signposting |
Activity 1: Find Windows Accessibility settings
Outcome
Open the main Accessibility area and identify where Windows groups different support options.
Suggested time: 5 to 10 minutes
Prepare
- save any work you have open
- make sure you can see your Windows desktop or taskbar
- decide that you will explore first and only change a setting when the instructions say to
Follow the steps
- Press and hold the Windows key, then press U.
- Wait for Settings to open on the Accessibility page.
- Scan the page without changing anything. Look for categories connected with vision, hearing, interaction and focus.
- Choose one category name that relates to something you would like to make easier.
- Use the Back button to return to the main Accessibility page.
- Close Settings, then use Windows key + U again to practise the return route.
If your screen looks different
Use the search box in Settings. Type the outcome or feature name, such as text size, captions or mouse pointer. On a managed device, some settings may be unavailable.
Check your result
☐ I opened Accessibility settings with Windows key + U
☐ I identified at least one display, hearing, reading or interaction option
☐ I can return to the same page without starting again
Your notes
________________________________________________________________________
________________________________________________________________________
________________________________________________________________________
Activity 2: Explore display choices one change at a time
Outcome
Try a display adjustment, describe its effect and decide whether to keep or restore it.
Suggested time: 15 to 20 minutes
Part A: change text size
- Press Windows key + U to open Accessibility settings.
- Select Text size.
- Move the Text size slider slightly to the right.
- Review the preview, then select Apply.
- Look at labels in Settings and another open app. Notice what became larger.
- Decide whether to keep the change or return the slider to its earlier position and select Apply again.
Part B: try Magnifier
- Press Windows key + plus sign to open Magnifier.
- Press Windows key + plus sign again to zoom in.
- Move around the screen and notice whether you can still understand the wider context.
- Press Windows key + minus sign to zoom out.
- Press Windows key + Esc to close Magnifier.
Part C: preview contrast or colour options
- Return to Accessibility settings with Windows key + U.
- Open Contrast themes or Colour filters.
- Review the available choices before applying anything.
- If it is safe to do so, apply one choice and observe text, controls and backgrounds.
- Restore the previous choice if the change is not useful.
Decision prompt
Which change helped without hiding useful context or making another part of the screen harder to use?
Check your result
☐ I changed only one display setting at a time
☐ I could explain what the setting changed
☐ I kept or restored the setting based on its effect
Your notes
________________________________________________________________________
________________________________________________________________________
________________________________________________________________________
Activity 3: Explore hearing and interaction choices
Outcome
Find options for captions, audio, the pointer and keyboard, then choose one route to test.
Suggested time: 15 minutes
Part A: find live captions
- Press Windows key + U.
- Open Captions or Live captions in the hearing area.
- Review the caption style or appearance choices.
- If live captions are available, turn them on and play a short piece of spoken audio.
- Compare the spoken audio with the on-screen text and note any words or context that need checking.
- Turn live captions off when you finish if you do not want them to remain active.
Part B: make the pointer easier to locate
- Return to the main Accessibility page.
- Open Mouse pointer and touch.
- Try a small change to pointer size or colour.
- Move the pointer across light and dark areas of the screen.
- Keep or restore the setting based on how easy the pointer is to locate.
Part C: review keyboard choices
- Open Keyboard in Accessibility settings.
- Read the descriptions for Sticky Keys, Filter Keys and Toggle Keys.
- Choose one option to explore only if its description matches a difficulty you want to address.
- Note the name of the option and leave it off if you are unsure about changing it.
Accuracy matters
Captions provide another route to spoken information, but names, specialist terms and important context still need checking.
Check your result
☐ I found caption appearance or live caption controls
☐ I tested a pointer choice in more than one screen area
☐ I chose a keyboard option by the task, not by an assumption
Your notes
________________________________________________________________________
________________________________________________________________________
________________________________________________________________________
Activity 4: Change the reading experience
Outcome
Use Immersive Reader or Read Aloud without changing the source text.
Suggested time: 15 to 20 minutes
Prepare a safe practice item
- open a short non-confidential document or email in a supported Microsoft 365 experience
- choose a paragraph that you are allowed to use for practice
- remember that feature location and availability can differ by app, version and organisational policy
Part A: use Immersive Reader
- Find Immersive Reader in the app you are using. It may be available from a View area or another reading option.
- Open Immersive Reader and confirm that the source opens in a separate reading experience.
- Change one option, such as text spacing, column width, page theme or line focus.
- Read the same paragraph and notice whether the change affects effort or comprehension.
- Try one additional option only after you have assessed the first.
- Close Immersive Reader and confirm that the original document or message is unchanged.
Part B: use Read Aloud
- Return to the document or message and find Read Aloud.
- Start playback and follow the words on screen while listening.
- Pause, move backwards or forwards, and adjust the pace if those controls are available.
- Stop playback and identify one place where listening supported checking or comprehension.
- Remember that Read Aloud reads the available text. It does not correct unclear writing.
Choice, not replacement
Use reading tools as optional routes. Shared content still needs clear language, meaningful headings and accessible structure.
Check your result
☐ I changed the reading experience without editing the source
☐ I used playback controls to suit the task
☐ I can explain when Immersive Reader or Read Aloud may be useful
Your notes
________________________________________________________________________
________________________________________________________________________
________________________________________________________________________
Activity 5: Create editable text using Dictate
Outcome
Speak a short passage, review the result and correct it before use.
Suggested time: 10 to 15 minutes
Prepare
- open a new blank non-confidential document in a supported Microsoft 365 app
- check that your microphone is available
- move to a quieter place where possible
- decide on two short sentences to say
Follow the steps
- Find and start Dictate in the app.
- Allow microphone permission if your organisation and device permit it.
- Speak one short, clear sentence at a natural pace.
- Pause and review the text that appears.
- Speak the second sentence, including punctuation commands only if you know they are supported in your setup.
- Stop Dictate.
- Review names, punctuation, specialist terms and any words that sound alike.
- Edit the text using the input route you prefer, then save or delete the practice document.
Privacy check
Use non-confidential practice text. Follow your organisation’s information-handling rules when using microphone-based or connected features.
Check your result
☐ I produced editable text with Dictate
☐ I checked the result rather than assuming it was accurate
☐ I corrected the text using a route that worked for me
Your notes
________________________________________________________________________
________________________________________________________________________
________________________________________________________________________
Activity 6: Use accessible participation routes in Teams
Outcome
Turn on a personal caption or viewing option and identify alternatives to speaking in the moment.
Suggested time: 10 to 15 minutes
Use a practice meeting or the next live session
- Join a Teams meeting where you are authorised to practise these features.
- Open More actions and find the language, speech or accessibility options available in your version of Teams.
- Turn on live captions for your own view.
- Compare the captions with a short spoken contribution and check important names or terms.
- Review the available meeting view or zoom controls and choose a view that helps you follow.
- Identify whether chat, Q&A or reactions are available as alternatives to speaking.
- Use one appropriate participation route, then turn off any temporary setting you do not want to keep.
Consider the presenter’s role
☐ describe important on-screen content
☐ say relevant contributions from chat or Q&A aloud
☐ avoid relying on colour or visual position alone
☐ allow time for people using different participation routes
Personal and shared responsibilities
Personal captions and viewing choices can reduce friction, but presenters still need to make the shared session and materials accessible.
Check your result
☐ I turned on a personal caption or viewing option
☐ I identified at least one alternative to speaking
☐ I know that caption accuracy and important context need checking
Your notes
________________________________________________________________________
________________________________________________________________________
________________________________________________________________________
Activity 7: Support another person through choice
Outcome
Use a simple, respectful conversation to explore options without requesting personal information.
Suggested time: 10 minutes
Scenario
A colleague says that reading a long document on screen is taking extra effort. Your role is not to diagnose the reason or select a setting for them. Your role is to offer manageable choices.
Practise the conversation
- Begin with: “There are a few built-in options we can explore together.”
- Ask: “Would you like to see display, reading, hearing or interaction choices?”
- If they choose reading, offer two relevant routes, such as Immersive Reader and Read Aloud.
- Describe what each option changes before turning it on.
- Ask the person which option they would like to try first.
- Change one setting or open one feature.
- Ask whether it helped, then keep, adjust or restore it based on their choice.
- Record only the practical route they chose if a record is genuinely needed. Do not record assumptions about why.
Neutral phrases to use
- “some people may find this useful”
- “we can try it and change it back”
- “which route would you prefer”
- “did that help, or would you like to try another option”
Phrases to avoid
- statements that link a feature to an assumed diagnosis or identity
- telling the person which setting they should use
- asking for medical or personal information that is not needed
- treating the first choice as permanent
Check your result
☐ I began with the task or barrier
☐ I offered more than one route where useful
☐ I left the decision with the person
Your notes
________________________________________________________________________
________________________________________________________________________
________________________________________________________________________
Put it together: your personal return route
Choose one feature you want to reuse. Complete the prompts so you do not need to remember every step.
The task or friction I want to address
________________________________________________________________________
________________________________________________________________________
The feature I chose
________________________________________________________________________
________________________________________________________________________
How I return to it
________________________________________________________________________
________________________________________________________________________
What I changed
________________________________________________________________________
________________________________________________________________________
How I know whether it helps
________________________________________________________________________
________________________________________________________________________
How I restore or stop it
________________________________________________________________________
________________________________________________________________________
Who I can contact if the setting is managed
________________________________________________________________________
________________________________________________________________________
Fast routes
| Route | What it helps you reach |
|---|---|
| Windows key + U | open Windows Accessibility settings |
| Windows key + plus sign | open Magnifier and zoom in |
| Windows key + minus sign | zoom out in Magnifier |
| Windows key + Esc | close Magnifier |
| Windows key + A | open Quick settings |
| Windows key + Ctrl + O | open the On-Screen Keyboard |
Final reminder
Explore, test, choose and signpost. The best option is the one that supports the person, task and environment without unnecessary pressure or assumptions.
Reflective journal
Why we ask you to reflect
Continuing Professional Development (CPD) is formative and it is about what it achieves for you and your organisation.
Instead of formally assessing your learning, we ask you to write a reflective note. This should reflect on how the learning was relevant and how it will impact your working practices.
Taking time to reflect on your learning makes it more likely you will embed it in your future practice.
What to cover and when
What your reflection should cover
- how the learning was relevant to you
- how the learning will impact your practice
When to complete it
Reflect as soon as possible following the skilling session. This keeps your note contemporaneous (written close to the time) and meaningful. Fill it in on your device, so the boxes expand as you type.
| Topic | What to know |
|---|---|
| Timing | Complete the note as soon as possible after the training event. |
| Purpose | To embed the learning within your subsequent practice. |
| Focus | How the learning was relevant and how it will impact your practice. |
Your reflective note
Complete each row below. Write in your own words. Your notes are private to you unless you choose to share them.
| Prompt | Your response |
|---|---|
| Skilling session title | |
| Date of the skilling session | |
| Date you completed this note | |
| How was the learning relevant to you and your work? | |
| How will the learning impact your practice? |
Recommended resources
hese curated resources accompany the WeChange.AI skilling offer of Continuing Professional Development (CPD) accredited, and non-accredited, sessions. Use them before a session to build familiarity, or afterwards to revisit and apply the learning in day-to-day work.
Alongside these resources, Navigator helps WeChange.AI customers find personalised recommendations and available learning on Microsoft 365 tools, accessibility and AI relevant to their role. Returning to Navigator after a session can help you connect new knowledge with practical workplace needs, choose a useful next step and keep learning visible as confidence grows.
A single starting point for the accessibility features available across Microsoft 365 apps. Useful for finding options for yourself or for a colleague you are supporting.
A hub with guidance for a range of needs, for individuals and for organisations. It helps you move from one feature to the wider support available.
A topic page that groups features for people with visual differences. Helpful when you want to try options before changing settings.
Brings together built-in features that support people with hearing differences. A good place to check before a meeting or session where audio may be a barrier.
Collects features and resources for neurodivergent users, including focus aids. Useful for exploring options privately before deciding what works for you.
Describes tools that support people who find a mouse or keyboard harder to use. Helps you recognise alternatives so nobody has to work in a way that does not suit them.
A Microsoft Learn product guide to tools that read text aloud and support fluency and comprehension. It lists the Microsoft apps where Immersive Reader is available.
Explains how speech to text works in several Microsoft 365 apps. A useful alternative for anyone who finds typing tiring, slow or difficult.
Describes the built-in tools for having Word documents read back to you. Helpful for proofreading by ear and for people who prefer to listen.
Explains how captions appear during Teams meetings and that they support multiple languages. Helpful for people who like to read as well as listen, or who join from a noisy place.